Wednesday, December 30, 2009

HELLOOOO OUT THERE!!

Hey friends! I am so sorry for the unexpected blogging hiatus. My taking 3 weeks off was completely unintentional, but my "real life" has been so upside down and busy that my blog had to go to the back burner.

I had so much more Christmas stuff I wanted to post, and I didn't even get to join in on the Nester's Christmas party. Who knows, maybe I'll backtrack and put some of that stuff up anyway.

So what have we been up to? Well, both boys had their school Christmas programs...

And then Lonnie was "Santa" for both schools.
Can you believe the boys have no idea this is their dad?
As usual, I took on too many handmade Christmas projects and was scrambling to get them all done. I'll try post about some of those soon.

The boys have been sicker than they have ever been. So sick that Conman was actually hospitalized for a short spell. Here is my little guy about to be discharged chowing down on some Pringles.
Thankfully, things are starting to look up. The boys are finally feeling more like themselves. We had a fantastic Christmas and I plan to find my blogging mojo again soon. I hope you had a wonderful Christmas season, and I am gonna try to catch up with all of you soon.

Thursday, December 10, 2009

Handprint Angel Ornament/Garland...

I teach the 4 and 5 year olds every week in Sunday School. Being that I love to craft, I always try to come with good things for the kids to make that go along with our lesson. This past week we studied in the book of Luke where the angel told Mary that she was going to give birth to baby Jesus. I decided an Angel was the craft to make. BUT, a cute angel that 4 and 5 year olds could make was key. I came up with this little Angel Christmas ornament, and the kids loved them. I did most of the work in advance because it is hard to do with a lot of kids really quickly (we had 11 kids this week with just Lonnie and I), but at home the boys and I made these quite easily.
Materials:
scrapbook paper or craft foam (body, head, and hair)
posterboard or cardstock (wings)
Clothespins
pencil (to trace child's hands)
pipe cleaner (halo)
ribbon (to hang your garland on)

Start off by tracing your child's hand prints on to the posterboard or cardstock. I found it works best to trace the left hand and then have them put their right thumb in the thumbprint of the left hand. They need to keep their fingers together. The pics below explain this better.


Next, draw out your outfit (girl or boy), hair, and head. I traced a bottle cap for the head and free-handed the outfits on scrapbook paper. If you don't feel like you could free-hand the clothes, just hold a piece of paper over your computer screen and trace the ones I did. That is probably a terrible method, but it would work. Cut out all of your pieces. You could let the kids draw the face on the angel.

Make the pipe cleaner look like a halo by wrapping it around your finger. Glue it to the top of the clothespin.

Then glue on your body, and save the head and hair for last.
The final step is to glue your wings to the back side of the clothes pin.
This is how it looks from the side. You could put your wings on the same side of the pin as the angel, but I wanted the dimension it gives by doing it this way.


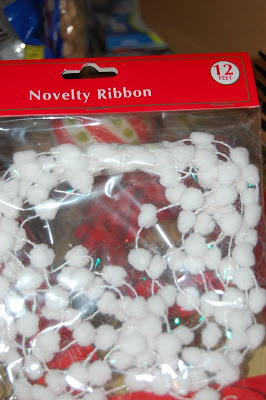
I bought this pom pom ribbon at the Dollar Tree for, you guessed it, $1.

String it up and clip on the angels.
Here is the girl version, but I used some of the pom pom ribbon as a halo and printed card-stock to trace Connor's handprints.
Here are the boys' 2 angels on my little tree in the kitchen window. I put most of the ornaments the boys make on this tree because those are extra special to me. I just wrapped the pom pom ribbon around the tree and clipped them right on.

My kids loved these and I loved that they had the kids handprints on them. I hope you make some yourself. Let me know how they turn out.

Tuesday, December 8, 2009

FUN Paper Ornaments!

I am happy to say that my 2 boys inherited my love for working with their hands. We are always looking for crafts that they can do with me. I saw an idea for paper ornaments a while back, and decided to put my own spin on it. I have TONS of scrapbook stuff but have not scrapped in a long time, so this one allows me to use some of that fantastic paper. Here is a quick and easy tutorial on how to make your own.
Materials:
Scrapbook Paper (the thicker kind works best)
Ribbon
Hole Punch
Scissors or Paper Cutter

This is REALLY EASY and there are a million different ways you could do this and get very different looks. Feel free to put your own spin on it, but here is how I did mine.

I took 12x12 scrapbook paper, and cut it in half. I then cut the 6x12 piece of paper into 12 strips of 1x6 inch paper. Next, pick 6-12 pieces of the colors you like and make a pile. The more paper you use the fuller your ornament will be. If you choose a double sided paper, then you may want to use fewer pieces so you can see in the middle.

Now, punch a hole in both ends of the strips.

Cut a piece of ribbon 22-24 inches long. Fold it in half and feed it through one of the holes.
Tie a knot.

Feed the other end of the ribbon through the other hole and decide where you want to tie your knot. This will determine whether the ornament is short and fat or tall and skinny. I liked mine best short and fat, but that is your preference.
(I added a bead to this one, but not the others, so that is optional.)

Spread out the strips of paper.

Next, let your extremely proud toddler hold up what he made for the camera.

Finally, take your new ornaments and put them on your tree for all to enjoy!
I hope you make some of these. They really are quick and easy. Let me know if you do. I'd love to see them!
I am linking up to a few other blogs for this one:
DIY Day @ ASPTL

Monday, December 7, 2009

Best of the Week...

I figured you might be wondering where I am. I've been so scarce around here lately that you might need a magnifying glass (like Connor) to spot me.
It was Con's 3rd birthday last week, and we did 2 small parties instead of one big one. It was so much easier this way. He had his party at school with his friends.
And then he had his party at home with family. We had pizza and birthday cake and the little man did it all in his underwear. Oh the beauty of a party with family! Walker was convinced it was his birthday too. Every.Single.Person. that got Connor a gift got Walker one too. When we sang Happy Birthday Walker even added his own name to the end of the song and helped blow out the candles on the cake.
I have also been spending a lot of time working on Christmas presents. Not really great ones, but more of the little tedious kind. I made 4o little Santa treats for the boys' friends at school. I'll post about those this week.
"Santa" did all of his/her shopping this week. We had 2 kids in tow. We drove 2 cars and used a tag team method. The boys went into stores and showed us everything they liked, then Dad stayed behind to show Santa while we went on to the next store.
We got the annual Santa pic at the mall the same night.
Saturday it was cold and wet out, so we spent the entire day at home, in our jammies!! Lon was off work (from all of his jobs) which is a rarity these days, so we had a family day. It was wonderful. The boys and I made Christmas ornaments for their teachers, and did some baking. Then we had movie night and popcorn before bedtime. Walker has still been working on some dance moves. I thought I would offer some assistance and teach him to move his hips. He obviously doesn't need my help. I hope he never loses the confidence to dance like no one is watching!
Oh, and Walker and I snuggled in our Snuggies. Ridiculous? Absolutely, but Walker and I both got one and we love them. (Most of these pics are from Thanksgiving in TN at my parents' house).
The boys and I have been making a lot of handmade Christmas ornaments this year, so I will try to get all those posted this week so you can make them if you want to. I let my Sunday School class (4 and 5 year olds) make angels yesterday at church, and they loved them. That is one you will definitely want to do with the kids.
I hope you had a wonderful week and I hope to catch up with you all soon!

Tuesday, December 1, 2009

Connor's Birthday Shirt...

Today was Connor's 3rd birthday. We had him a little party at his pre-school, and we will have a family party tomorrow night. I'll post about that tomorrow, but for now I wanted to share a cute t-shirt design!

I have started a tradition of sorts by making the boys a t-shirt to wear on their birthdays. For Walker, since he was getting a puppy this year, it was a dog-themed shirt. For Connor, I really didn't have a theme, so I had a little fun with it.
I was gonna just do a big number 3, but decided a cake would be more fun. This was really quite simple. Since he is 3, I gave the cake 3 tiers, and 3 candles on top. I think 3 is probably the limit on this, but a double decker cake with 2 candles would be really cute for a 2 year old.
First off, I free handed my design on the paper side of the Heat-n-Bond.
I then choose my fabrics and ironed the Heat-n-Bond to the fabrics.
Next I cut out my shapes and laid them out on the shirt.
I did the cakes and candles first, then ironed on the "icing" and flames last.
I used a terry cloth material for the "icing" and fleece for the flames, simply because it was what I had on-hand. Those 2 fabrics made the t-shirt so much cuter and gave it a great texture.
I used the no-sew variety of Heat-n-Bond, and it specifically says not to sew it, so I am anxious to see how it holds up. I doubt it will ever be worn again, but Connor sure enjoyed wearing it today!Everyone loved it, especially Connor. I hope you make one! If you do send me a pic. I'd love to see what you come up with!