This time around I took down all of the pictures and painted a tobacco color inside the molding.


What do you think?


 But after a little TLC, they have found a new lease on life! The black and white one I sold at an antique store downtown, hence the price tag.
 But this lime green one is the chair in my craft room. I'm sitting in it now, proud as a peacock. If you want all the details on how this transformation occurred, you can follow this link.
 Another one of my favorites is this old entertainment center. Lon's grandma gave it to me, and it was definitely dated, but it was free and that is my favorite word!
 Nothing a new coat of paint and some beadboard on the back couldn't fix! I had my brother in law help me with this project while he was in town and it is also in my craft room. You can go here if you want a step by step on what we did.
 But they are perfect on my front porch. I also added decorative door knobs for some detail to the tops of the chairs.
 Last but not least, is another item in my craft room. It is the white shelf that holds all my fabrics. There is no "before" picture because I left it exactly as it was. It was given to me when an office went out of business. It held documents, but fits all my fabric perfectly.
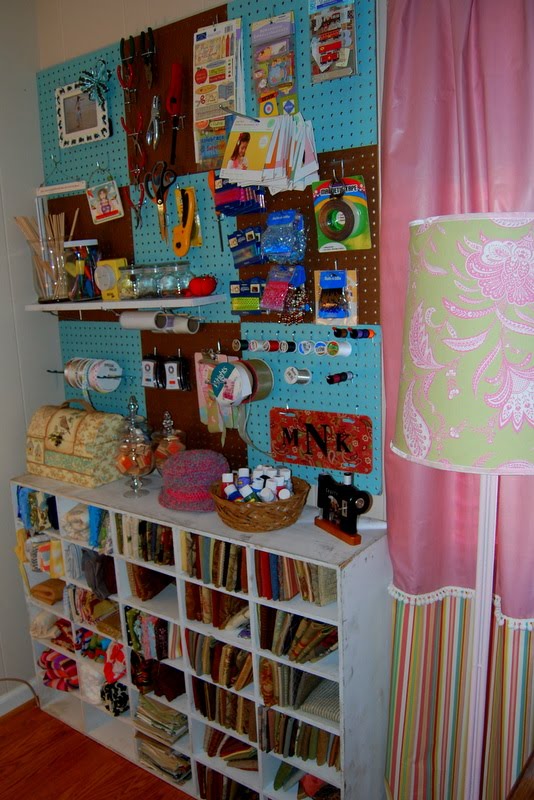 Thanks for stopping by, and for lots more Roadkill Rescues don't forget to visit Infarrantly Creative!

 They love to use this spray gun handle on the spray paint. If you do much spray painting and don't have one of these, you need one. It will change your life. Just sayin'. It costs $2 at Wal-Mart.


 I am linking up to ASPTL's DIY Tuesday

 This is looking in the door from the hall. He still has a bedrail, but he rarely sleeps in this bed. I could probably get rid of it. The bedding is from Target. It is a cowboy print quilt.
 To the left. Valances are from Lowe's.
 His closet and toy chest sit on the same wall as the door. I chose to leave the doors off the closet so that we would have a place for the train table. It was the perfect size and the boys love to play there. It also forces me to keep his closet tidy.
 This boot is from TJ MAXX and it happened to have Walker's name on it. It is probably one of my favorite things in the room.
 This is a little shelf I got from Micheal's and painted red. Those are some old cowboy boots Walker wore for Halloween and the picture is one of my favorites of Lon and Walker goofing around in Walker's child-size cowboy hats. I simply added scrapbook letters that said Cowboy to the mat on the inside of the frame.
 I made these little stars for his nursery 5 years ago and they have just sort of stuck around, but I still like them in his room.
 These prints were all bought online via e-bay, and then I got frames from Hobby Lobby and framed them myself. The bottom left is a pic of the boys at Dixie Stampede.
 Walker's bedside table was from a clearance sale at a furniture store a few years ago. It was less than $50 and is a really nice piece. The basket on top holds his library books so they don't get misplaced and it was from Habitat for Humanity for $1.
 But most of all, I have made so many wonderful friends!! I am so thankful for the friendships that I have made through the blog, and all of the wonderful new things all of you have taught me through your own blogs. So, I'm gonna have a giveaway!
 Now, the rules are simple. Just leave me a comment and you will be entered. I am gonna take names until midnight, Tuesday October 13. It seems like an odd time, but since 13 is my lucky number it works. Good luck and thanks for a wonderful year!


 I then washed the whole thing down really well with some soapy water. While the chair is drying, I start prying off the fabric from the cushion.
 and sit on the chair hoping it doesn't fall over. Mine didn't so I was good to go!
 I actually got 2 of these chairs at the dump over the summer. The other one is my chair in the craft room. This is how it turned out and a link to that post if you want the details.


